|
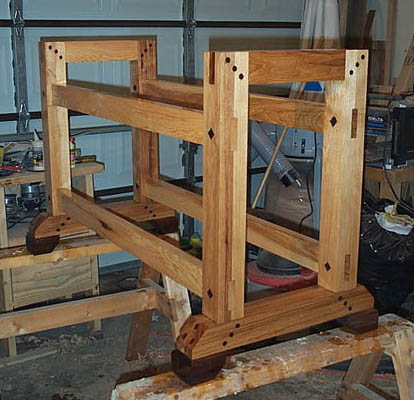
 Every Good Boy Needs A Bench!Though I've never actually had any direct interaction with the man, I'd like to thank Bob Key for producing the single most useful resource I've come across for planning and building a workbench. Unfortunately, Bob decided that his woodworking was a distraction from his startup business, and his website is no longer available except in archived format. I've been using this bench for a few years now and every time I do something on it, I'm happy I made it. It's a pleasure to work on. It doesn't move when I plane stuff, it's just the right height... I only wish I had the space to keep and use an even larger bench. I started with a basic frame to hold up the top. All the posts are laminated pecan and are 3" square. the braces are 1 1/2" by 3". The through tenons are actually through pinned with square walnut pegs. The diamond shapes you see are not caps.
The pecan is from a really super buy I got at a local cabinetmaker's supply store, and the walnut is a really super buy I got from a great guy in Boyd, Texas. I was going to make this bench out of 2x4s like the plans on Bob's pages recommend for building your first bench, but the walnut and pecan cost less. Go figure. The top is 5' 9" long and is skirted with walnut. I've set it up with three rows of dog holes, and there's a traditional tool tray on the back side. Gluing it up was a project that took several days, and and boy was it one heavy thing to move around... Below, you can see the top all glued up. It was actually glued in several stages over a week. I face and edge jointed all of the boards before thicknessing them. It made glue-up much easier. The tray was assembled and then glued to the rest of the top. There's a very long stubby mortise and tenon arrangement holding the tray bottom to the sides, but the ramps are just glued, as is most of the rest of the top.
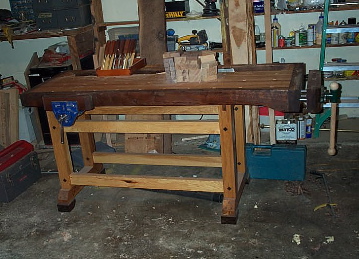
...And here's the whole thing...
I hand planed the top flat, using a #5 to knock off the worst stuff, then switched to a #7 to try the top. I finished with a #4 with a nice sharp Hock blade. I finished the legs with General Finishes Arm-R-Seal, and the top is finished with Watco Danish Oil, and wax. Every time I use this workbench, I'm happy that I made it. It's not perfect, and each of it's flaws I could enumerate off the top of my head without difficulty. It is, however, pretty good stuff. If you have any desire to make your own traditional joiner's bench, do. Take your time doing it, and it will make your woodworking that much more pleasant. |
|
|
|


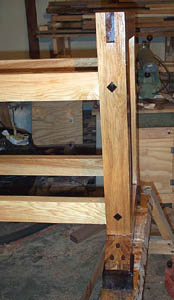 To the right, you can see the pin and doweling details and the bridle joint a little more clearly. The joints are super tight because radial arm saws are awesome. Well, the joints are super tight because Wally Kunkel rocked, his book is great, and DeWalt radial arm saws are awesome.
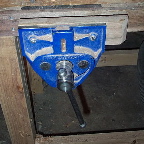
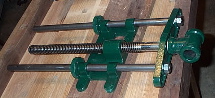 On the left and right of this page, you can see the vises that I fitted to the bench. The front vise is a quick action Record 53ED and the end vise is a large front vise from Veritas. I'm pretty happy with both of them. The Record is far and away better than any of the Chinese knockoffs, and you can tell where you pennies went when you buy one. The veritas is also very good, and is made in the Czech Republic. I have noticed a number of really nice tools being manufactured there, and the cost has been very reasonable. I'd buy either of these vises again.